
Viking/Husqvarna has introduced the USB stick as a medium to store designs. The USB stick replaces the floppy drive in the earlier models of the Designer 1. The USB stick contains 13 "virtual floppies", one to store designs you create/modified on the Designer 1 and 12 to store design collections. These virtual floppies are stored as files in the root of the USB stick; VFD.bin contains designs stored on the machine, VFD00.bin thru VFD11.bin contain design collections.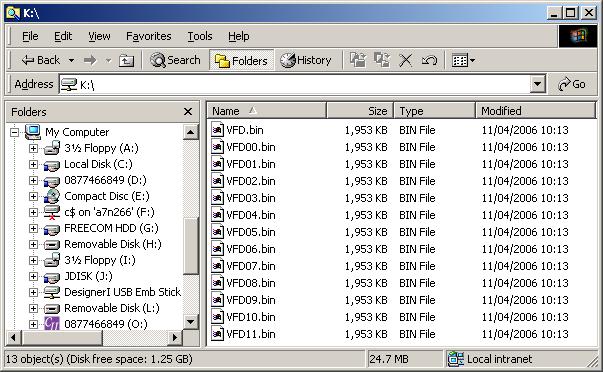 PES2Card utility offers the facility to read and write virtual floppies for use in the Viking Designer 1. The process is similar to writing a physical floppy. Below you find instructions on how to write a virtual floppy for the designer 1. NOTE: the PES2Card or PES2Card3 or PES2Card3-SE card module needs to be powered on and working; a card is not needed. Click here for instrcutions to see immediately whether the card module is working The first step is to open the virtual floppy you want to read or write. You can do this on the Read Card dialog. Press the Browse button and navigate to your USB stick or any folder containing a virtual floppy. Your screen will look like:  Let's assume you want to open VFD06.bin which is floppy 7 on your machine. Click on VFD06.bin and press Save. You will see: 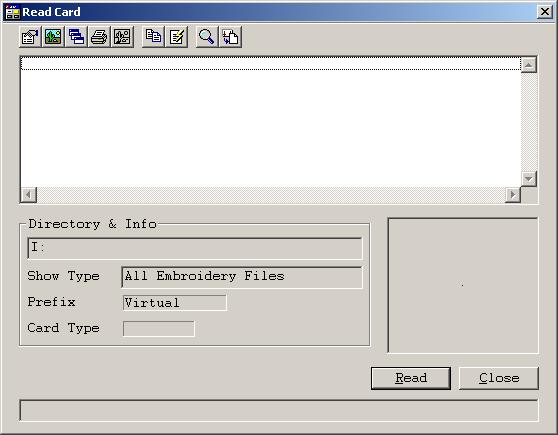 There are a number of items to observe here: 1. The directory is set to I:. I: is the new drive letter assigned to the virtual floppy drive. The drive is fully accessible using Windows Explorer. Darg and drop and all other Explorer operations are available. Note however that you can not modify the data on the virtual drive using Explorer; when the drive is dismounted, the changes are lost. The Send To function below, will save the data written to the virtual floppy. Please take notice of the drive letter as you will need the drive letter when writing to the virtual floppy. 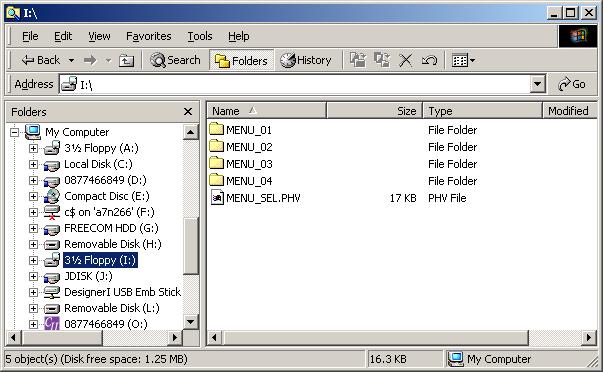 Below you find instructions on how to verify what is on the virtual floppy. 2. There are no designs displayed. This is normal for Designer 1 design collections. Now we have mounted a virtual floppy, we can follow the same procedure for writing designs for the Designer 1 as if we had a physical floppy. As usual with PES2Card, you can add designs to a card using the Add button on the Write Card dialog. Below you see a design set ready to be written. 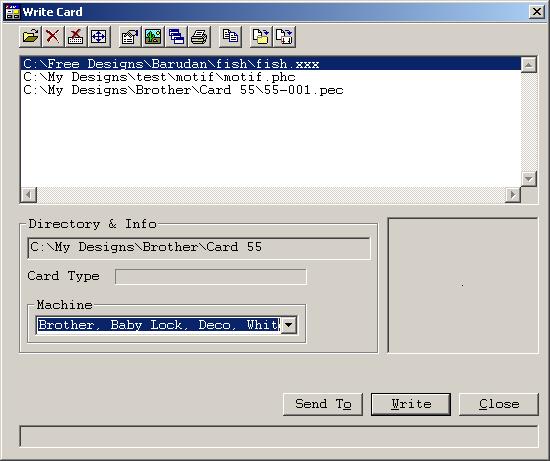
When you press the Send To button on the Write Card dialog, the designs are converted to SHV format and written to the floppy. Also other supporting files like MHV and PHV files will be written to the floppy. The next step is to press the "Send To" button. After pressing Send To, you will see: 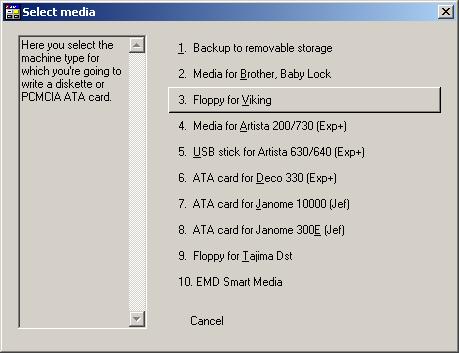 Press Floppy for Viking, which will bring you to: 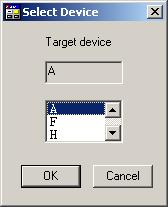 Here you get the last opportunity to select the drive to write the designs to. In the case above scroll to driver letter I and select this driver letter by a single click on the I. Press OK to confirm your selection and the copy will start. Note: the rest of this page refers to A: as the drive letter; you need to replace the A by I or the drive letter you got assigned. 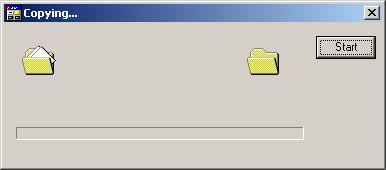 When you press the Start button, the writing starts. You can still cancel out of writing designs to the floppy by clicking on the cross in the top right corner. You will be invited to insert a "floppy" in the selected drive. Press the OK button to tell PES2Card utility to contnue. 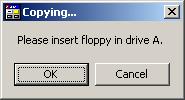 A warning will be displayed that designs by the same name can be overwritten. Press OK if you're happy with that. 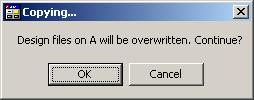 A progress dialog will be displayed while copying. Very soon you will be back on the Write Card dialog. You can verify the designs are really written on the Read Card dialog. Press Browse to select the floppy; drop down the "Save as type" combo and select Viking, Husqvarna (*.PHV). You will see:  Press Save to return to the Read Card dialog. 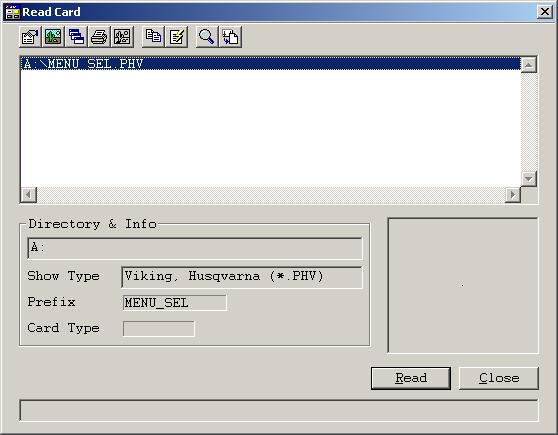 Press properties to bring you to the menu set that will be shown on the machine. Now you can look at the individual menus to review the designs written to the floppy. NOTE: PHV files may also reside on your hard drive or other media. The Read Card dialog will display them the same way. If you copy your design floppies to your hard drive, you can easily view them using PES2Card utility. |
Last Modification: May 28, 2007
(c) Copyright 2003-2007, Jos Timmermans