
PES2Card utility 2.00.009 introduces the possibility to create a catalog of the designs read from a card. You press the Catalog button and PES2Card utility will do the rest. I will use Brother card #55 as an example. I read this card using PES2Card. Under "My Designs" I have a folder named "Brother" to store the design on my Brother cards. Inside this folder I created a folder named "Card 55" for easy later reference. Some users prefer meaningful names. So the name could have been "Gardening" too or even "Gardening (55)". After creating the folder I switched to the folder. I set the prefix to "55-" so I can see immediately that a design is part of card #55. The end result after reading you can see below.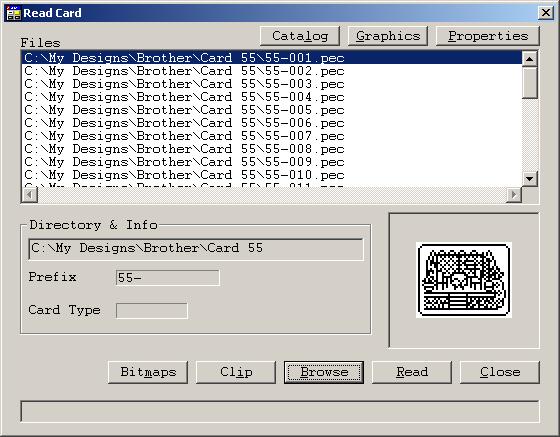
Notice the additional "Catalog" button on the top of the Read Card dialog. When you press this button, PES2Card utility will create a catalog for the designs in the current folder, in my case C:\My Designs\Brother\Card 55". The catalog will be stored in a subfolder of this folder which is named "Catalog". The catalog is stored as html output. You can display the contents of this folder by double clicking in Windows Explorer on index.htm. After pressing the Catalog button, PES2Card utility will create the catalog and also start your default (favorite) Internet Browser. The catalog has been tested to work with Microsoft Internet Explorer and Netscape. Below you can see one I prepared using Internet Explorer. 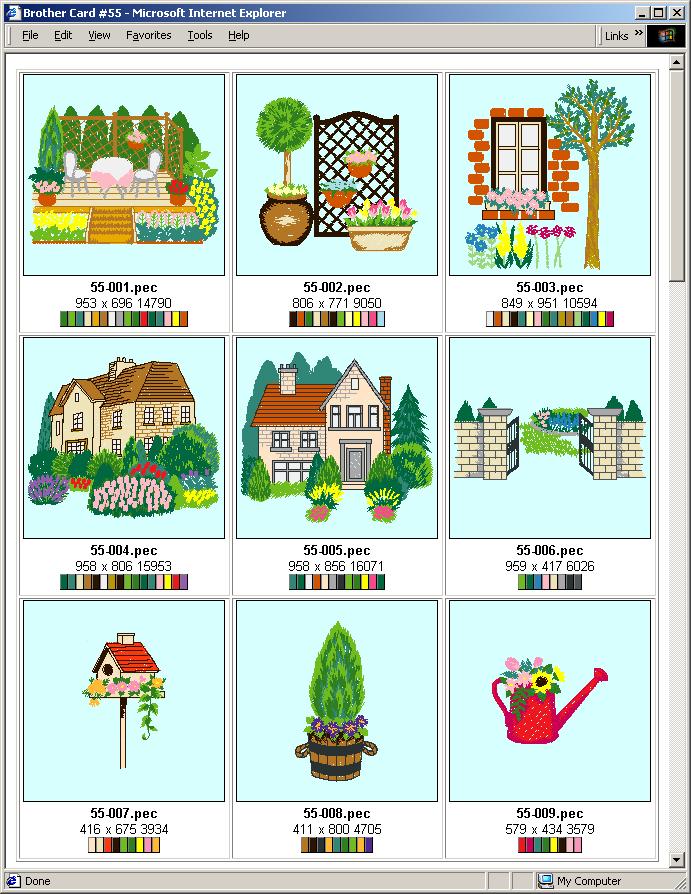
On the top of the screen you see that I managed to set the caption to "Brother Card#55". After presing the Catlog button, you are presented with a dialog providing the opportunity to set the "title" of the html page. This will become useful for printing too. 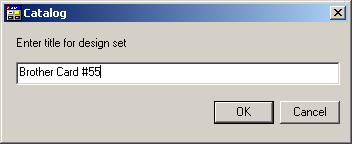
In the case that you don't want a title, just type a single space and press the OK button. If you press the Cancel button, PES2Card utility will understand that you didn't want to have a catalog after all. Drag and drop The pictures of the designs shown in the catalog can be dragged and dropped on the file list on the Write Card dialog. You do this by pressing the left mouse button down above a picture and holding it down. You then move the mous with the left button still down above the file list of the Write Card dialog and release the left mouse button. You will notice that the name of the design is added to the list of designs to be written. Printing The catalog is organised so it will print exactly 9 designs on a page. If you browser has a "Print Preview" function, you can see how it looks like without printing. You can also see that page breaks are inserted at appropriate places. And lastly you will see that the pages have headers and footers. These headers and footers are under your control, so you determine how they look like. You do this by pressing File, Page Setup. 
In the Header and Footer boxes, specify the information to be printed by using the following variables. Variables can be combined with text (for example, Page &p of &P).
|
Last Modification: Mar 21, 2003
(c) Copyright 2003, Jos Timmermans